本文主要讲述 Hexo-yilia 主题对于文章持久化及天气等插件的配置。
1.持久化URL
1 npm install hexo-abbrlink --save
在根目录中打开 _config.yml 文件,找到 permalink 项,修改:
1 2 3 4 5 6 permalink: archives/:abbrlink.html permalink_defaults: abbrlink: alg: crc32 rep: hex
中英文映射:
1 2 3 4 5 6 7 8 9 10 11 12 13 category_map: 网站: site 小程序: miniprogram 开发工具: tools tag_map: 标签分类: kinds 基础: basic Web框架: web_frame 数据库操作: sql_action 数据分析: data_analysis 爬虫: spider 自动化测试: auto_test
参考:hexo持久化配置
2.文章图片的导入
在hexo主题中,直接用markdown的语法:如
方式一:上传七牛云 入门详情 使用: 获取七牛云图片链接
方式二:使用插件:
1 npm install hexo-asset-image --save
打开文件 node_modules/hexo-asset-image/index.js ,替换内容为下面的代码:
1
2
3
4
5
6
7
8
9
10
11
12
13
14
15
16
17
18
19
20
21
22
23
24
25
26
27
28
29
30
31
32
33
34
35
36
37
38
39
40
41
42
43
44
45
46
47
48
49
50
51
52
53
54
55
56
57
58
59
60
61
'use strict' ;var cheerio = require ('cheerio' );function getPosition (str, m, i ) { return str.split (m, i).join (m).length ; } var version = String (hexo.version ).split ('.' );hexo.extend .filter .register ('after_post_render' , function (data ){ var config = hexo.config ; if (config.post_asset_folder ){ var link = data.permalink ; if (version.length > 0 && Number (version[0 ]) == 3 ) var beginPos = getPosition (link, '/' , 1 ) + 1 ; else var beginPos = getPosition (link, '/' , 3 ) + 1 ; var endPos = link.lastIndexOf ('/' ) + 1 ; link = link.substring (beginPos, endPos); var toprocess = ['excerpt' , 'more' , 'content' ]; for (var i = 0 ; i < toprocess.length ; i++){ var key = toprocess[i]; var $ = cheerio.load (data[key], { ignoreWhitespace : false , xmlMode : false , lowerCaseTags : false , decodeEntities : false }); $('img' ).each (function ( if ($(this ).attr ('src' )){ var src = $(this ).attr ('src' ).replace ('\\' , '/' ); if (!/http[s]*.*|\/\/.*/ .test (src) && !/^\s*\// .test (src)) { var linkArray = link.split ('/' ).filter (function (elem ){ return elem != '' ; }); var srcArray = src.split ('/' ).filter (function (elem ){ return elem != '' && elem != '.' ; }); if (srcArray.length > 1 ) srcArray.shift (); src = srcArray.join ('/' ); $(this ).attr ('src' , config.root + link + src); console .info &&console .info ("update link as:-->" +config.root + link + src); } }else { console .info &&console .info ("no src attr, skipped..." ); console .info &&console .info ($(this )); } }); data[key] = $.html (); } } });
打开根目录配置文件 _config.yml ,修改如下:
1 2 post_asset_folder: true
重新生成后,会在文章同级目录建立一个同名文件夹,可以存放图片。
1 {% asset_img example .jpg This is an example image % }
参考:图片引用配置
方式三:存放到根目录
1 2 3 4 5  <!-- e.g. -->  <!-- 使用样式: --> <img src ="" width ="50%" height ="50%" >
参考:知乎提问
3.Hexo网站运行时间 在文件 themes/yelee/layout/_partial/left-col.ejs 中,(具体位置可自选)加入如下代码:
1 2 3 4 5 6 7 8 9 10 11 12 13 14 15 16 17 18 <span id ="timeDate" > 载入天数...</span > <span id ="times" > 载入时分秒...</span > <script > var now = new Date (); function createtime ( var grt= new Date ("11/23/2018 20:00:00" ); now.setTime (now.getTime ()+250 ); days = (now - grt ) / 1000 / 60 / 60 / 24 ; dnum = Math .floor (days); hours = (now - grt ) / 1000 / 60 / 60 - (24 * dnum); hnum = Math .floor (hours); if (String (hnum).length ==1 ){hnum = "0" + hnum;} minutes = (now - grt ) / 1000 /60 - (24 * 60 * dnum) - (60 * hnum); mnum = Math .floor (minutes); if (String (mnum).length ==1 ){mnum = "0" + mnum;} seconds = (now - grt ) / 1000 - (24 * 60 * 60 * dnum) - (60 * 60 * hnum) - (60 * mnum); snum = Math .round (seconds); if (String (snum).length ==1 ){snum = "0" + snum;} document .getElementById ("timeDate" ).innerHTML = "本站已安全运行 " +dnum+" 天 " ; document .getElementById ("times" ).innerHTML = hnum + " 小时 " + mnum + " 分 " + snum + " 秒" ; } setInterval ("createtime()" ,250 ); </script >
日期格式: 月/日/年 时:分:秒。
参考:Hexo-Yilia进阶笔记
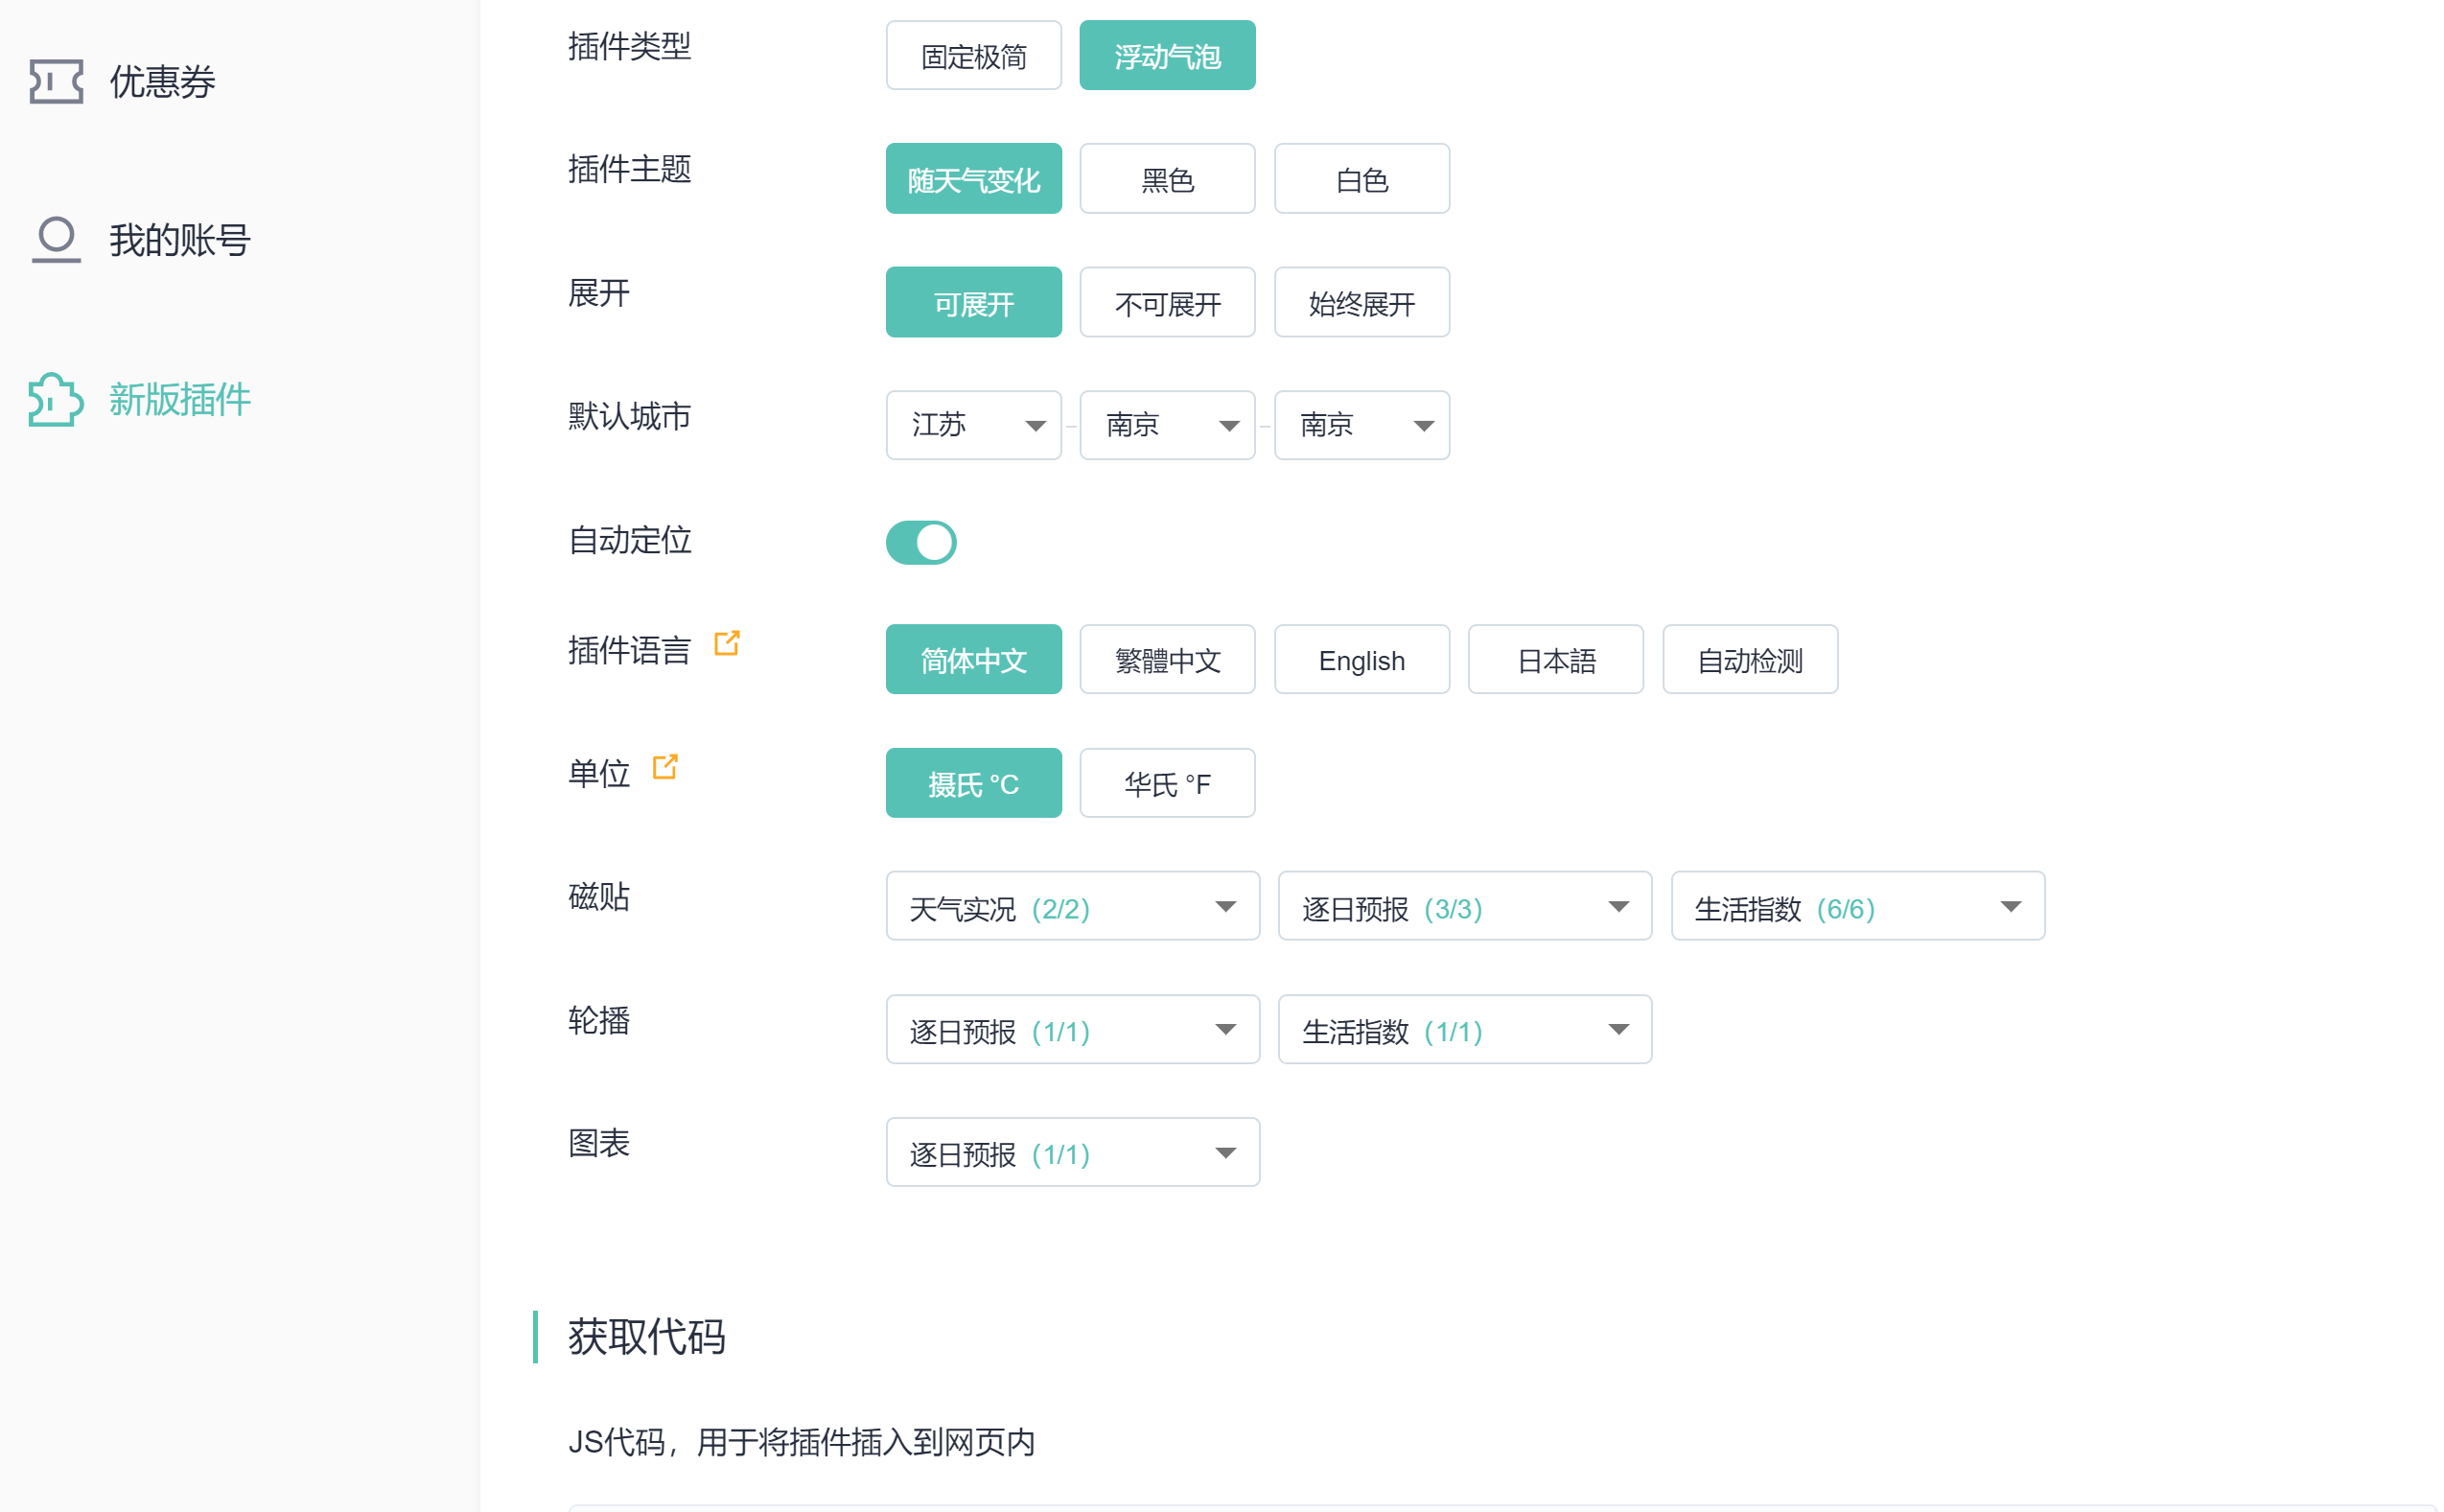
4.添加心知天气 4.1.注册账号,设置天气样式:
如:
1
2
3
4
5
6
7
8
9
10
11
12
13
14
15
<div id="tp-weather-widget" ></div> <script > (function (a,h,g,f,e,d,c,b ){b=function (createElement (g);c=h.getElementsByTagName (g)[0 ];d.src =e;d.charset ="utf-8" ;d.async =1 ;c.parentNode .insertBefore (d,c)};a["SeniverseWeatherWidgetObject" ]=f;a[f]||(a[f]=function (q =a[f].q ||[]).push (arguments )});a[f].l =+new Date ();if (a.attachEvent ){a.attachEvent ("onload" ,b)}else {a.addEventListener ("load" ,b,false )}}(window ,document ,"script" ,"SeniverseWeatherWidget" ,"//cdn.sencdn.com/widget2/static/js/bundle.js?t=" +parseInt ((new Date ().getTime () / 100000000 ).toString (),10 ))); window .SeniverseWeatherWidget ('show' , { flavor : "bubble" , location : "WTSQQYHVQ973" , geolocation : true , language : "zh-Hans" , unit : "c" , theme : "auto" , token : "31a8562e-ae28-47fe-860d-d4e01b0867c2" , hover : "enabled" , container : "tp-weather-widget" }) </script >
4.2.添加配置
打开 themes/yilia-plus/layout/_partial/left-col.ejs 文件,在合适位置添加:
1 2 3 4 5 6 7 8 9 10 11 12 13 14 15 16 17 18 <% if(theme.xinzhi_weather){ %> <div id ="tp-weather-widget" > </div > <script > (function (a,h,g,f,e,d,c,b ){b=function (createElement (g);c=h.getElementsByTagName (g)[0 ];d.src =e;d.charset ="utf-8" ;d.async =1 ;c.parentNode .insertBefore (d,c)};a["SeniverseWeatherWidgetObject" ]=f;a[f]||(a[f]=function (q =a[f].q ||[]).push (arguments )});a[f].l =+new Date ();if (a.attachEvent ){a.attachEvent ("onload" ,b)}else {a.addEventListener ("load" ,b,false )}}(window ,document ,"script" ,"SeniverseWeatherWidget" ,"//cdn.sencdn.com/widget2/static/js/bundle.js?t=" +parseInt ((new Date ().getTime () / 100000000 ).toString (),10 ))); window .SeniverseWeatherWidget ('show' , { flavor : "bubble" , location : "WTSQQYHVQ973" , geolocation : true , language : "zh-Hans" , unit : "c" , theme : "auto" , token : "31a8562e-ae28-47fe-860d-d4e01b0867c2" , hover : "enabled" , container : "tp-weather-widget" }) </script > <% } %>
参考:添加天气
5.添加百度推送 5.1.新建 baidu-push.ejs 文件 在 yilia-plus/layout/_partial 下添加 baidu-push.ejs 文件,内容如下:
1 2 3 4 5 6 7 8 9 10 11 12 13 14 15 16 <% if (theme.baidu_push ){ %> <script > (function ( var bp = document .createElement ('script' ); var curProtocol = window .location .protocol .split (':' )[0 ]; if (curProtocol === 'https' ) { bp.src = 'https://zz.bdstatic.com/linksubmit/push.js' ; } else { bp.src = 'http://push.zhanzhang.baidu.com/push.js' ; } var s = document .getElementsByTagName ("script" )[0 ]; s.parentNode .insertBefore (bp, s); })(); </script > <% } %>
5.2.引用 baidu-push.ejs 编辑 layout/_partial/head.ejs,添加:
1 <%- partial('baidu-push' ) %>
5.3. 添加 baidu_push 属性 编辑 yilia/_config.yml ,添加:
6.添加版权声明 6.1.方式一:修改 aricle.ejs 文件 在 layout/_partial/aricle.ejs 中合适位置,添加:
1 2 3 4 5 6 7 8 9 10 11 12 13 14 15 16 17 18 19 20 21 22 23 24 25 26 27 28 29 30 31 32 33 34 35 36 37 38 39 40 41 42 43 44 45 46 <% var sUrl = url.replace(/index\.html$/ , '' ); sUrl = /^(http:|https:)\/\// .test(sUrl) ? sUrl : 'https:' + sUrl; %> <% if (((theme.copyright.copyright_type === 2 ) |1 && post.copyright)) && !index){ %> <div class ="declare" > <ul class ="post-copyright" > <li > <strong > 本文作者: </strong > <%= config.author %> </li > <li > <strong > 本文链接: </strong > <%= sUrl %> </li > <% if (theme.copyright_text | %> <li > <span > <strong > 版权声明: </strong > </span > <% if (theme.copyright.copyright_text == null |true ){ %> <span > 本博客所有文章除特别声明外,均采用 <a rel ="license" href ="<%= theme.copyright.licensee_url %>" title ="<%= theme.copyright.licensee_alias %>" > theme.copyright.licensee_name %></a > 进行许可。转载请注明出处! </span > <% if (theme.copyright.licensee_img != undefined){ %> <span > <a rel ="license" href ="<%= theme.copyright.licensee_url %>" > <img alt ="知识共享许可协议" style ="border-width:0" src ="<%- config.root %><%= theme.copyright.licensee_img %>" /> </a > </span > <% } %> <% } else { %> <%= theme.copyright.copyright_text %> <% } %> </li > <% } %> </ul > </div > <% } else { %> <div class ="declare" hidden ="hidden" > </div > <% } %>
6.2.方式二:新建 declare.ejs 文件
1 2 3 4 <%# "版权说明" %> <% if (theme.copyright) {%> <%- partial('post/declare') %> <% } %>
打开样式文件 themes\yilia-plus\source\main.b8fa34.css ,添加样式:
1 2 3 4 5 6 7 8 .post-copyright { margin : 0em 0em 0em 0em ; padding : 0.5em 1em ; border-left :3px solid #ff1700 ; background-color : #f9f9f9 ; list-style : none; font-size : 14px ; }
6.3.添加 copyright 属性 打开主题配置文件 _config.yml,添加:
1 2 3 4 5 6 7 8 9 10 11 copyright: copyright_type: 2 licensee_url: https://creativecommons.org/licenses/by-nc-sa/4.0/ licensee_name: 'CC BY-NC-SA 4.0' licensee_alias: '知识共享署名-非商业性使用-相同方式共享 4.0 国际许可协议' licensee_img: /images/copyright.png copyright_text:
参考:Yilia主题优化 Yilia版权声明
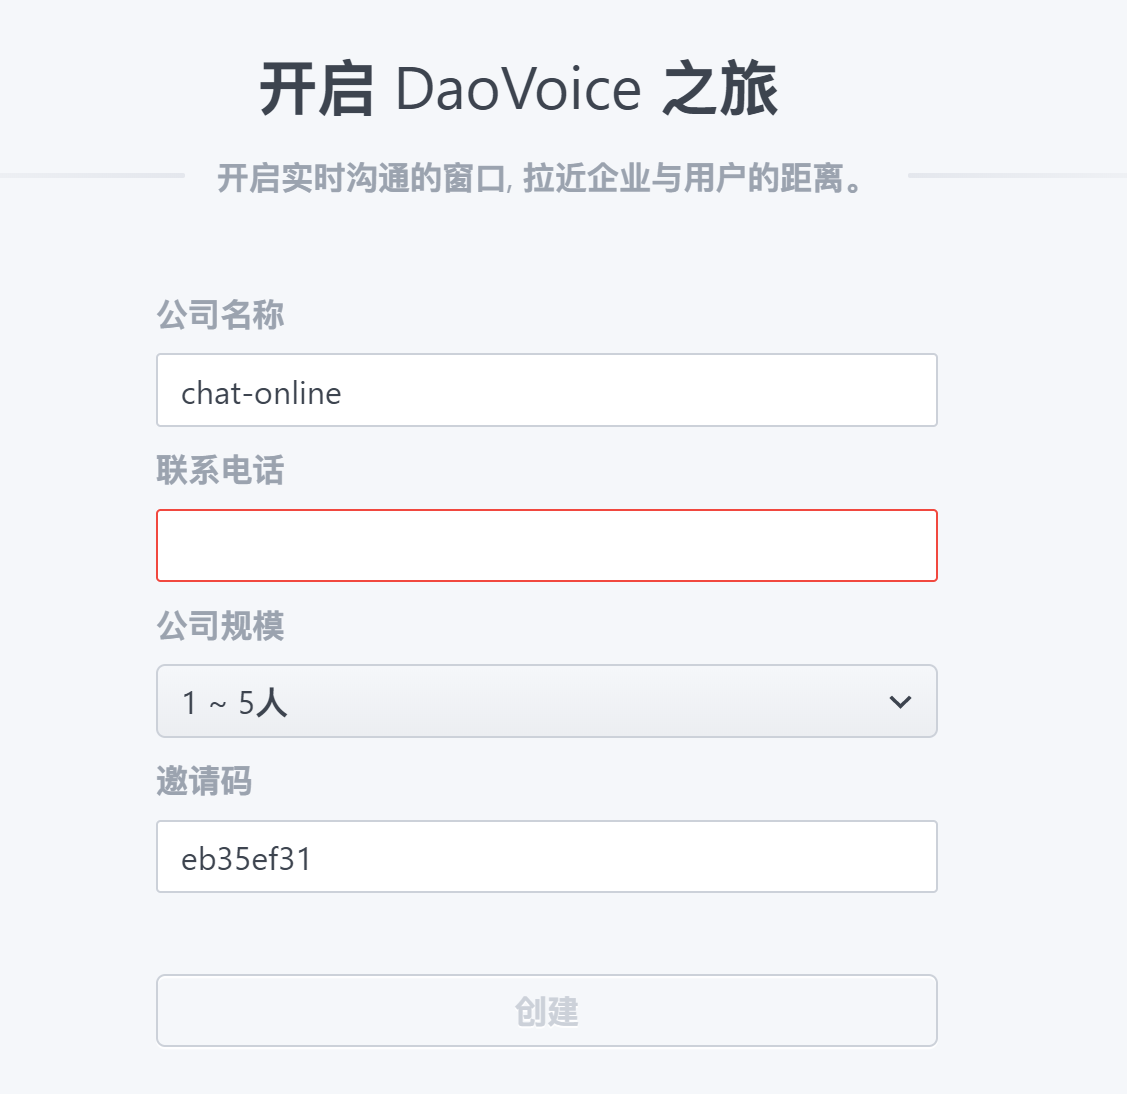
7.添加在线聊天 7.1.注册
可以通过点击 点击接入[应用设置][安装到网站]
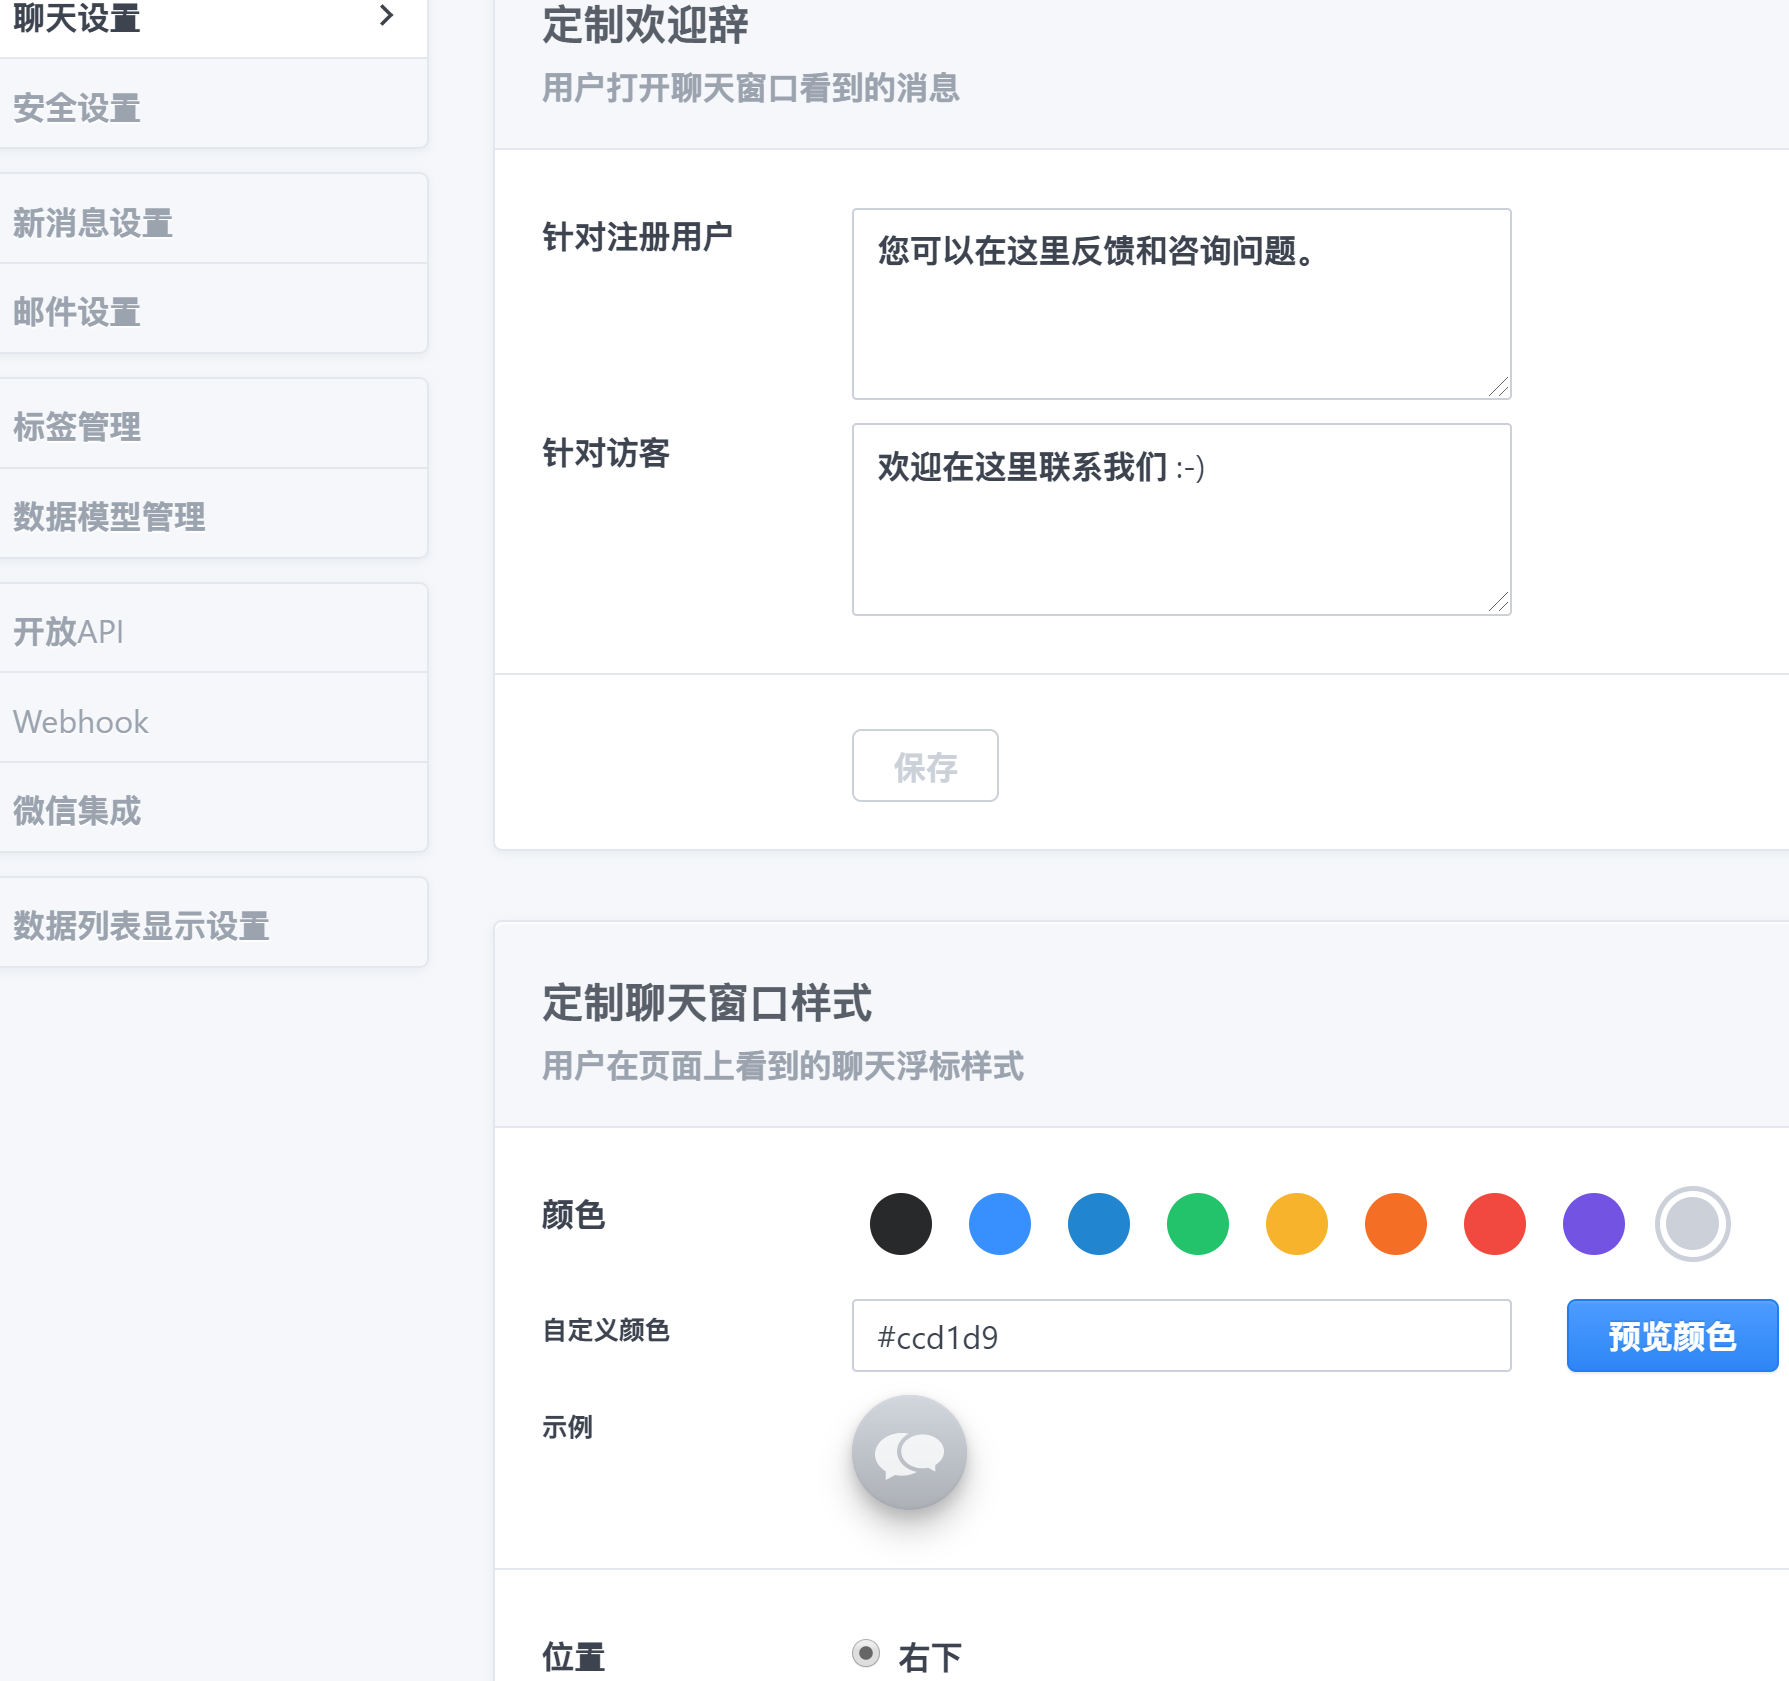
找到 [应用设置][聊天设置]
接下来有提示,复制框1、3中的代码到head文件中,放在 </head> 标签之前。
7.2.在文件 head.ejs 中添加配置 打开文件 themes\yilia-plus\layout\_partial\head.ejs,添加:
1 2 3 4 5 6 7 8 9 10 11 12 <%# "在线聊天" %> <% if (theme.daovoice) { %> <script > (function (i,s,o,g,r,a,m ){i["DaoVoiceObject" ]=r;i[r]=i[r]||function (q =i[r].q ||[]).push (arguments )},i[r].l =1 *new Date ();a=s.createElement (o),m=s.getElementsByTagName (o)[0 ];a.async =1 ;a.src =g;a.charset ="utf-8" ;m.parentNode .insertBefore (a,m)})(window ,document ,"script" ,('https:' == document .location .protocol ? 'https:' : 'http:' ) + "//widget.daovoice.io/widget/<%= theme.daovoice_app_id %>.js" ,"daovoice" ) daovoice ('init' , { app_id : "<%= theme.daovoice_app_id %>" }); daovoice ('update' ); </script > <% } %>
7.3.配置参数 在主题配置文件 _config.yml 中,添加:
1 2 3 daovoice: true daovoice_app_id: ""
,是不生效的